Update!
Universal Split Screen has been superseded by Proto Input, which is part of Nucleus Co-Op.
Borderlands 3
This guide has been written by /u/TerrawattSurge. See the original post here.
This guide is for multiple gamepads only. You may wish to experiment with the settings in Universal Split Screen to make multiple keyboards and mice possible.
Setup
-
Download Universal Split Screen from the releases page and extract it. I installed it in
C:/Universal Split Screen 1.1.1/ -
Download the script here. You may need to right-click and
Save page as, or something similar. You may save it anywhere. -
Open the script with Notepad (or any text editor). If you have a monitor size other than 1920x1080, edit
$x_resand$y_resfor your monitor size. If you want a horizontal split,$y_resshould be half your monitor vertical resolution and subtract a bit for the title bar. -
Change the install directory of
$USS_Pathif you installed Universal Split Screen somewhere else. -
(Optional in case the script doesn’t run) Run Windows PowerShell. Paste the command
Set-ExecutionPolicy -Scope CurrentUser Unrestrictedand press Enter. If a prompt is given, type A and press Enter.
Split screen setup
-
Hide the task bar. In Windows 10, right-click on the taskbar and go to
Taskbar Settings, then enableAutomatically hide the taskbar in desktop mode -
Launch the script by right-clicking it and then
Run with PowerShell. Wait until the instances are launched and have finished loading. -
Open Universal Split Screen by running
UniversalSplitScreen.exe. In the options tab, disableDraw mouseand enableHook XInput for gamepads. You may wish to save this as a preset for fast setup. -
Select the first instance of Borderlands 3 and drag it to the top of the screen.
-
Alt+tab back to Universal Split Screen and switch to the
Current Windowtab. Make sure in theWindow Titlebox it shows ‘Borderlands® 3’ and change the controller index to 1. -
Select the second instance of Borderlands 3 and drag it to the bottom of the screen.
-
Alt+tab back to Universal Split Screen and make sure in the ‘Window Title’ box it shows ‘Borderlands® 3’ (but a different window handle), then change the controller index to 2.
-
You can try the
Toggle Window Bordersbutton to hide the title bar, but for me the windows would keep jumping to the centre of the screen at random times so I learnt to live with the title bar. -
Press
Start Split Screen. -
In game, change your group settings to
LAN Playon both windows. -
In one of the windows, go to the Social Menu, select LAN Browser and select the game. If it doesn’t connect, wait until it times out then try joining from the other window instead.
-
Happy Vault Hunting!
Limitations
-
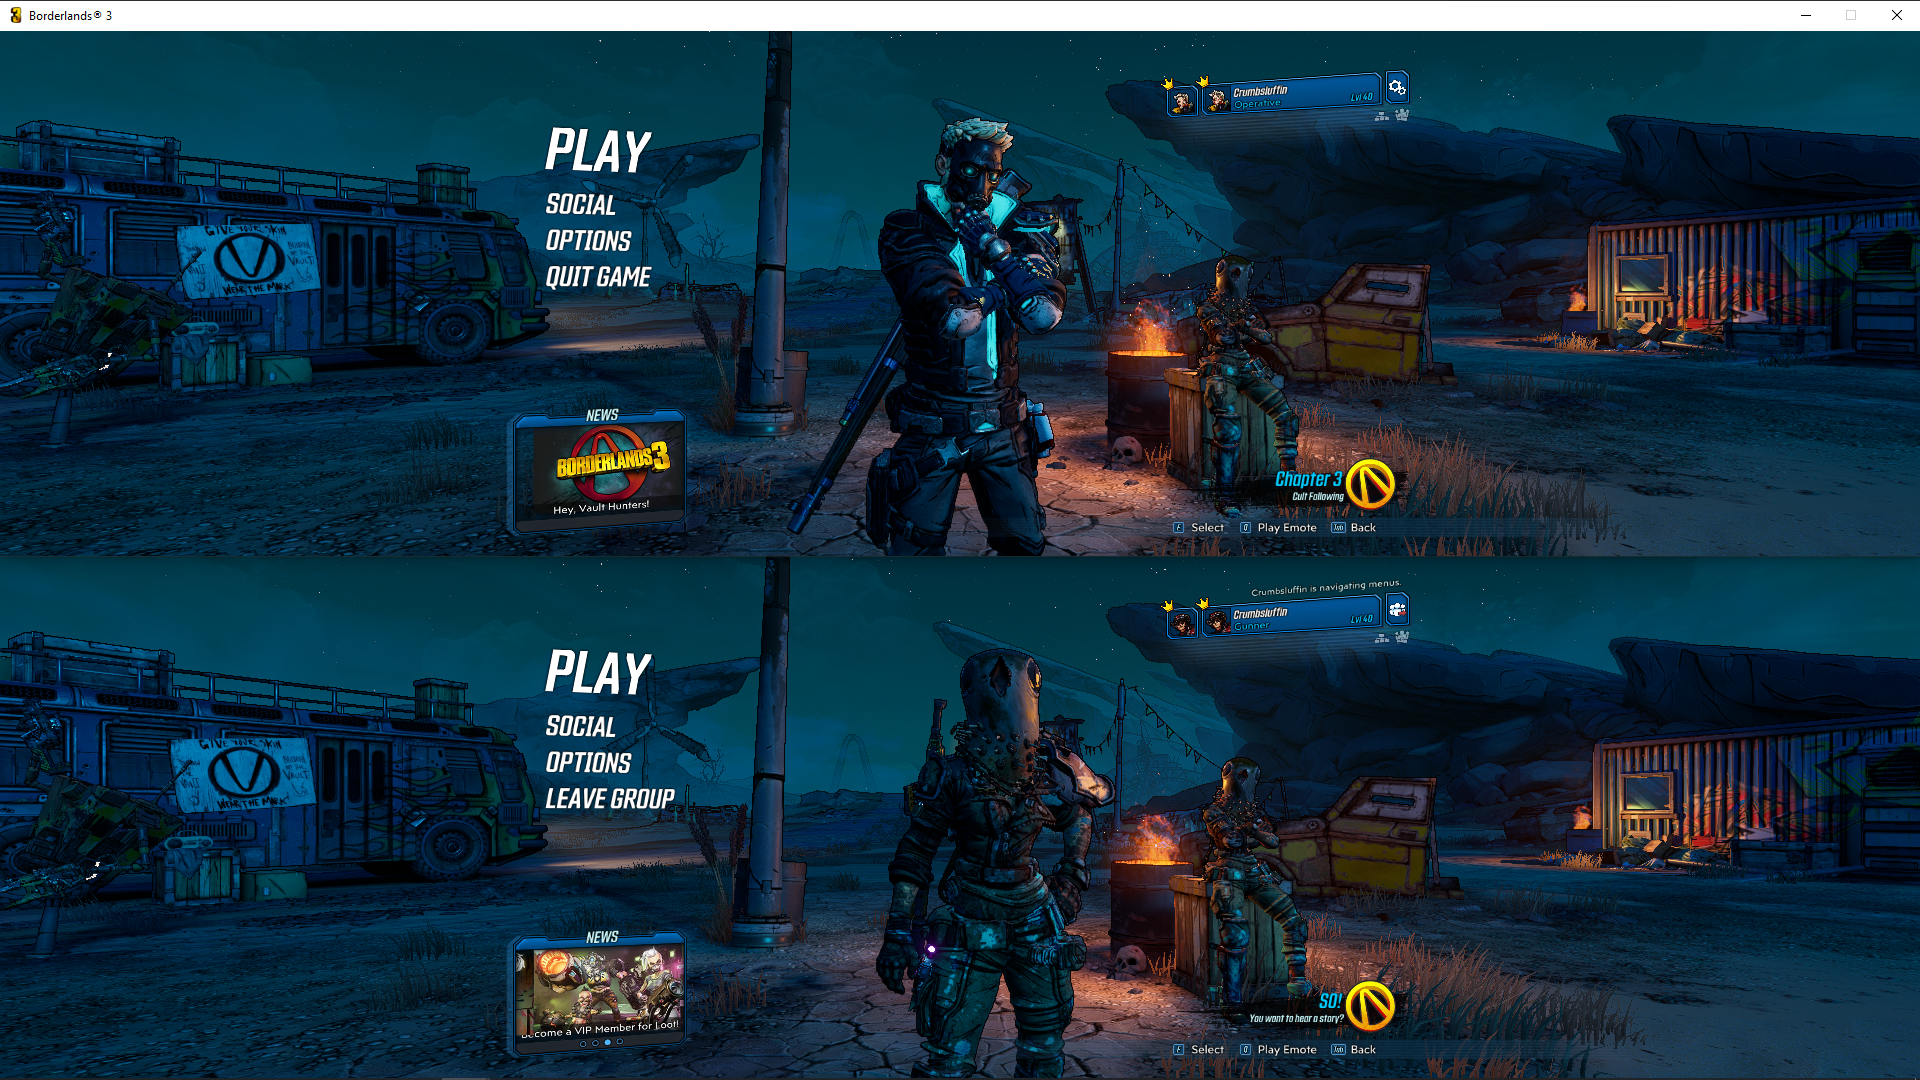
Only one window is ‘online’, so some functions are only available in that window. In the title menu, the online window will have a scrolling news feed, while the offline windows will just show the Borderlands 3 logo. In the screenshot attached, the bottom window is online.
-
Skins and trinkets aren’t saved for the offline window, so you can equip them and use them, but once unequipped they’re gone.
-
The bank is only saved for the online window, so if you want to store something, give it to the person playing on the online window to store.
-
Room decorations aren’t saved for the offline window.
-
The offline window cannot use ‘weapon pack’ weapons.
-
Audio isn’t always in sync, so you may want to turn down the dialogue volume on one of the windows.
-
The two instances of Borderlands 3 don’t share CPU resources equally, so I’ve added a section in the script to change processor affinity to assign unique processor cores to each window.
-
Removing the window borders causes the windows to randomly jump to the middle of the screen.
-
The script is currently only set up for 2 windows, but should work for more. Change your window size settings and duplicate line 53
Start-Process -FilePath $bl3_bin -ArgumentList $bl3_argto start more offline instances. -
Check out this guide for general Borderlands 3 issues and how to fix them.
If you have any comments, please leave them on the original guide post.